Quick & Easy Garlic Bread Sticks
- 3 cups flour
- 1 teaspoon salt
- 1 teaspoon garlic powder
- 1 tablespoon dry parsley (optional, for decoration)
- 1 tablespoon baking powder
- 1 cup milk
- 1/2 cup margarine (1 stick)
- 1 more teaspoon garlic powder
- 1/2 teaspoon salt (optional)
These are good and easy and they get eaten up so fast that you may have to make a double batch.
Begin with your favorite big bowl. Measure your flour, salt, garlic powder, parsley and baking powder into it. Stir the dry ingredients together so that the salt, garlic powder, parsley and baking powder are evenly distributed throughout the flour. Now pour in your milk. Stir with a big spoon until you get a ball of dough that leaves the sides of the bowl. You may have to dust the ball of dough with a little flour if it seems sticky to you. Gently knead the ball of dough right there in the bowl about 5 or 6 times. Now place your dough on the counter. You may place a sheet of waxed paper under it you like. Using a rolling pin or sturdy bottle roll the dough out into a rectangle shape. If the edges get all scraggly then use your hands to press them back up into main rectangle. It doesn’t have to be perfect. You are aiming for a rectangle that will fit into a 9 by 13-inch pan. When you get the dough the right size, set it aside.
Meanwhile place the margarine in a 9 by 13-inch pan. Place the pan in the oven at 425°. Allow the pan to preheat and the margarine to melt. When the margarine is melted, carefully remove the pan from the oven. It will be very hot, so don’t burn yourself. Sprinkle the second teaspoon of garlic powder and the 1/2-teaspon of salt into the pan. You do not have to use the extra salt. My crew likes their bread sticks salty so I always use it, but it isn’t vital. Now, very carefully lay your rectangle of dough into the pan, over top of the margarine. Next cut the rectangle into narrow strips. I use a pizza cutter for this because it seems to work the best. A sharp knife will work too though, so use what you have available. My method of cutting is to cut the dough in half and then cut each half in half and then each quarter in half, going on and on until I have a lot of narrow strips of dough. The margarine will creep up between the strips. This is normal. It is what gives these bread sticks their texture. After cutting your strips, place the pan in the oven, still at 425°, and bake them for 20 minutes. They will be brown and crispy when they are done. If desired you may serve them with small cups or bowls of spaghetti sauce or seasoned tomato sauce as a dip. Alternatively, they make a great hot bread with any Italian style meal like lasagna, spaghetti or anything of that ilk.
The parsley is simply for decoration. It makes the bread sticks look more “gourmet” but it adds little to the flavor or the texture. Leave it out if you don’t have any or are running low. If desired you may sprinkle the bread sticks with a little bit of parmesan cheese before or after baking. This tastes good, but once again, it is optional. This recipe is one of my most often requested one here at home. Family and friends alike have all fallen in love with it and beg me to make it for pot lucks and for regular family dinners. Essentially it is based on my recipe for Buttery Bread Sticks.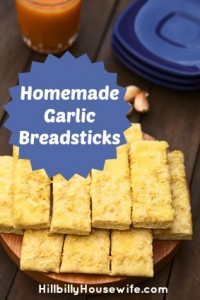
Here’s another great bread recipe. It’s a carrot banana bread recipe that’s as healthy as it is delicious.
To support the blog, check out the HBHW eBooks available on Amazon. Thank you!
Disclosure: Some of the links below are affilate links, meaning, at no additional cost to you, I will earn a commission if you click through and make a purchase.
